Skip to content
leficious.
WorkGalleryAboutContact
Loading page
← All projects

Still Life

A surrealist first-person puzzle labyrinth where taxidermy-still animals serve as rigid industrial counterweights and bridges while household appliances shiver, flee, and lean into your hand for warmth.

Role
Solo Game Designer & Developer
Year
2026
Stack
UnityC#Game DesignLevel Design
Play on itch.io ↗Download GDD (PDF) ↓

Official trailer for Still Life.

Open on YouTube ↗
Selective empathy and the L.O.P. loopThe 9-specimen counterweight catalogCompanion onboarding and the 5-state Lamp FSMThe Three-Story Archive (235 kg zero-slack combinatorics)The Cryo-Foundry and inverted vent circuitsBreaking player conditioning at the ShredderSurrealist shaders, Manhattan telemetry, and takeaways

Project brief

At a glance
01Design goal
Condition players across four architectural wings to exploit rigid animal specimens as deadpan hardware while nurturing a shivering 1.4 kg Desk Lamp companion—setting up an unscripted moral reversal at the finale.
02What I owned
Solo game design, combinatorial level design, C# companion AI and puzzle systems, custom HLSL Kuwahara/ink shaders, Manhattan conduit telemetry, and procedural world assembly.
03Scope
Solo project in Unity 6 (URP) developed for Peter Brinson's course at USC around the Situated Player Role of The Dreamer (World as Enigma).

Delivered

  • Engineered a 4-phase, 235 kg zero-slack vertical puzzle archive (Room II) where 100% of unlocked animal mass is simultaneously allocated across lifts, chasms, focus stands, and gates with 0 kg idle slack.
  • Built a 5-state Desk Lamp companion FSM (flashbang flee, cornered shivering, LMB drag-comfort, hopping follow, and fear interrupts) paired with zero-HUD Manhattan conduit telemetry across 5 rooms.

Overview

Still Life is a solo first-person puzzle game built in Unity 6 (URP) for Peter Brinson's class at USC around the Situated Player Role of The Dreamer (World as Enigma). Inside a monochromatic gallery-foundry, biological roles are inverted: animals (5 kg Chicken to 100 kg Horse) stand frozen as mute, taxidermy-like counterweights, planks, and gear wedges, while a 1.4 kg Desk Lamp shivers in the dark, flees in terror, and leans into your hand for warmth.

  • Designed the selective-empathy inversion premise, 9-specimen counterweight roster (5 kg–100 kg), and L.O.P. (Lure, Objectify, Pacify) puzzle loop.
  • Architected the 200m linear-Z facility across 5 rooms and 3 connecting hallways, including Room II's 4-phase 235 kg zero-slack vertical combinatorics and Room III's inverted cryo-vent circuit.
  • Programmed the DeskLampAI 5-state companion FSM, TerritorialLivingObstacle mimic behavior, Manhattan conduit telemetry shaders, and UInt32 static mesh consolidation (200+ FPS in Room IV).

Why I made this

Rather than lecturing the player about empathy through dialogue, I wanted the level design itself to manufacture a habit. For thirty minutes, every pressure plate, chasm, and crusher trains you to see animals strictly as kilograms and the Desk Lamp as your only living friend—until Room IV's industrial shredder rejects a 25 kg Dog as a 'Living Organism' and leaves you holding the only inanimate object in the room.

Media

Full uncut walkthrough across all five rooms and the Pure White finale.
01

01 / Premise & Inversion

Selective empathy and the L.O.P. loop

In Peter Brinson's framework, the Dreamer experiences a world governed by dream logic—an enigmatic internal coherence that the player acts within before fully realizing what its rules mean. Inspired by René Magritte's object paradoxes and the industrial silhouettes of Limbo and Inside, Still Life inverts the behavioral cues of organic creatures and manufactured hardware.

Across the gallery, every puzzle runs on the L.O.P. loop: Lure and comfort the 1.4 kg Desk Lamp so its warm dynamic light guides your way and powers light-sensitive sockets; Objectify and weigh rigid animal specimens (5 kg to 100 kg) onto brass scales, across 4.2m floor chasms, and into crusher gears; and Pacify environmental hazards (Territorial Chest Mimics and Freezing Cryo-Vents) so the Lamp can safely follow.

STILL LIFE: SELECTIVE EMPATHY INVERSION & THE L.O.P. CORE LOOP Built Around Peter Brinson's Situated Player Role of The Dreamer (World as Enigma) I. RIGID ANIMAL SPECIMENS (5 kg – 100 kg) • Surface Presentation: Taxidermy-still, mute, zero vertex animation • Player Treatment: Exploited as deadpan counterweights, planks & gear wedges TRUTH: Room IV sensors reveal they were LIVING ORGANISMS all along II. LIVING HOUSEHOLD APPLIANCES (1.4 kg Lamp / Mimics) • Surface Presentation: Shivers in cold/dark, hops, leans into warm touch • Player Treatment: Center of emotional attachment, warmth & route protection TRUTH: Room IV Shredder accepts the 1.4kg Lamp as an INANIMATE OBJECT 1. LURE & COMFORT (THE LAMP) Corner & rub the startled 1.4kg Desk Lamp (LMB drag) to restore its warm dynamic light & guide it forward. DeskLampAI.cs · 5-State Companion FSM 2. OBJECTIFY & WEIGH (THE BEASTS) Harvest 5kg–100kg rigid animals onto brass pressure plates, 4.2m chasm gaps (60kg Giraffe), and industrial gear intakes. AnimalTool.cs · WeightPressurePlate.cs 3. PACIFY & ROUTE (MANHATTAN TELEMETRY) Route Cyan/Gold/Green Manhattan conduits to Focus Stands (pinning Mimics) & Turn-Off Vent Tiles so the Lamp can pass. ConduitWireVisuals.cs · MechanicalCrusher.cs
Design DimensionLiving Household Appliances (1.4 kg Lamp & Mimics)Rigid Animal Specimens (5 kg – 100 kg Hardware)
Surface PresentationExpressive, skittish wildlife: shivers at 7 FPS in cold/dark, hops on a spring neck, leans into warm touch, or lunges territorially (Mimic Chests).Taxidermy-still museum specimens: zero vertex animation, zero vocalization, rigid posture, engraved with brass calibration rings.
Gameplay FunctionEmotional anchor & light/fear constraints: Desk Lamp illuminates dark rooms, powers optical sockets, and refuses to cross freezing jets or Mimics.Deadpan industrial hardware (5 kg to 100 kg): counterweights on brass scales, 4.2m chasm bridges (60 kg Giraffe), and mechanical gear wedges.
Shader & Visual LanguageLivingApplianceCreature.shader: 7 FPS hand-drawn vertex line-boil, warm subsurface life-blush near the Lamp, and shivering displacement.ArchivalAnimalSpecimen.shader: Triplanar museum ink cross-hatching, deadpan plaster/taxidermy shading, and world-space brass calibration ring.
Room IV Shredder VerdictAccepted as '1 INANIMATE OBJECT': Despite its warmth and fear, the gallery's sensors classify the 1.4 kg Desk Lamp as mere metal hardware.Rejected ('LIVING ORGANISM DETECTED!'): Feeding the 25 kg Dog triggers the safety alarm—exposing that the rigid animals were alive all along.
Master Facility Plan (Z = -12m to +188m): orthographic architectural blueprint across Rooms I–V and Hallways I–III.
3D cutaway title diorama introducing the monochromatic ink-and-plaster gallery aesthetic.
Archival specimen blueprint (FIG. 01 — HORSE, 100 kg) framing living creatures as calibrated industrial hardware.
02

02 / Specimen Roster

The 9-specimen counterweight catalog

To prevent physics sandboxes from devolving into messy object stacking, every specimen in the facility is calibrated to a strict multiple of 5 kg (from the 5 kg Chicken shim up to the 100 kg Plaster Horse), with only a single anomalous entry in the entire catalog: FIG. 04 — Desk Lamp (1.4 kg).

Catalog IDSpecimen / ApplianceRecorded MassMechanical ClassificationSystemic Role Across Rooms I–V
SPEC-01Chicken5 kgCalibration ShimFine-grain 5 kg increment for 15 kg / 20 kg / 55 kg composite locks in Rooms II & III.
SPEC-02Cat10 kgLight CounterweightPowers Hallway I's Focus Machine plate (10 kg) and pairs with Chicken (5 kg) for 15 kg locks.
SPEC-03Penguin15 kgStandard CounterbalanceSingle-unit 15 kg activator for 2F West Dog Vault, 1F SE Elevator, and Gold Focus Plates.
SPEC-04Dog25 kgMedium Doorstop & Finale AnchorOpens 25 kg gates in Rooms II–III; rejected by Room IV's shredder as a LIVING ORGANISM before awakening in Room V.
SPEC-05Deer40 kgPhase 3 Vault KeyUnlocked in Room II's Back-West Dual Vault; powers the 40 kg 3F Penthouse Gold Focus Plate.
FIG. 02Giraffe (Loading Blueprint #2)60 kg4.2m Chasm Bridge & Heavy WeightDual-purpose specimen: tips horizontally across 2F & 3F 4.2m floor chasms as a walkable plank OR weighs 60 kg on vault plates.
FIG. 03Tiger (Loading Blueprint #3)80 kgLift Ballast & Crusher Gear WedgePowers Room II's 80 kg 2F->3F Elevator and jams Room III's Central Mechanical Crusher gears.
FIG. 01Horse (Loading Blueprint #1)100 kgPath Blocker & Maximum BallastRises from Room I's floor hatch to corner the fleeing Desk Lamp, opens the 100 kg exit plate, and jams Room III's Upper Flywheel.
FIG. 04Desk Lamp (Loading Blueprint #4)1.4 kgLight Source, Companion & 'Object'Catalog note: 'It shivers in the dark and leans into your hand like something alive, but to the gallery's sensors it is still just an object.'
03

03 / Room I & Hallway I

Companion onboarding and the 5-state Lamp FSM

Room I (The Study & Plaster Horse) teaches both halves of the core loop without a tutorial popup. Approaching the Desk Lamp triggers a 0.68s startled neck crane and a 0.52s defensive flashbang as it leaps off the desk and flees into the dark. Fifteen seconds into the chase, a floor hatch drops open and the 100 kg Plaster Horse rises on a hydraulic lift—physically cornering the fleeing Lamp so the player can hold and drag LMB across its shade to warm it back to life.

Once comforted, the Lamp hops after the player and automatically mounts the Lamp Socket while the 100 kg Horse depresses the heavy brass plate to open the exit. In Hallway I, the Lamp freezes in fear before a lunging Territorial Chest Mimic until the player places the 10 kg Cat onto a Gold Plate—powering a Focus Stand whose golden spotlight levitates and pins the Mimic in mid-air.

DESK LAMP COMPANION 5-STATE AI & ENVIRONMENTAL FEAR INTERRUPTS Procedural Hopping Gait, 0.52s Defensive Flashbang, LMB Drag-Comfort & Cryo/Mimic Fear Interrupts STATE 0: IDLE ON DESK Perched on Room I Desk (Z = 13.3m, Dim Filament) STATE 1: FLASHBANG & FLEE 0.68s Crane -> 0.52s Blind Leaps off desk (-15s Horse) STATE 2: CORNERED SHIVER Trapped by 100kg Horse Shivers at 7 FPS in dark STATE 3: LMB WARMING UP Hold LMB + Drag across shade Warm golden bloom expands STATE 4: FOLLOWING Hops behind player (1.24m step) Auto-mounts Lamp Sockets INTERRUPT A: TERRITORIAL CHEST MIMIC (Hallway I & Room II) • Unpacified: Blocks Lamp & lunges if approached • Solution: Weight on Gold Plate -> Focus Stand beam levitates & locks Mimic INTERRUPT B: FREEZING CRYO-VENT STREAM (Hallway II & Room III) • Active Jet: Icy stream freezes Lamp in place at edge of beam • Solution: Strip pre-placed animal off Inverted 'Turn-Off' Vent Tile to cut power
Room I: The 100 kg Plaster Horse rising from the floor hatch to corner the startled Desk Lamp.
Room I Dual Exit: The comforted 1.4 kg Desk Lamp mounted on its socket alongside the 100 kg counterweight plate.
Hallway I: Placing the 10 kg Cat on the Gold Plate powers the Focus Stand, levitating the Territorial Chest Mimic so the Lamp can pass.
04

04 / Room II

The Three-Story Archive (235 kg zero-slack combinatorics)

Room II expands into a three-story vertical menagerie (1F Courtyard, 2F Mezzanine, and 3F Penthouse) containing 7 animal specimens totaling 235 kg. Rather than allowing leftover props to trivialize later doors, I designed a 4-phase zero-slack progression (55 kg → 115 kg → 195 kg → 235 kg) where unlocking each new specimen requires simultaneously locking 100% of your currently available animal pool across elevators, gold focus plates, chasm bridges, and vault gates.

The 60 kg Giraffe serves as a dual-mode spatial key: it can be tipped horizontally across 4.2m floor chasms on 2F and 3F as a walkable plank, or reclaimed into your inventory to serve as a 60 kg counterweight on guarded vault plates. Once the 40 kg Deer is unlocked in Phase 3, the Giraffe wedges permanently across the 3F chasm to prevent upper-floor soft-locks during the 235 kg finale.

STILL LIFE — ROOM II GATE, ELEVATOR & VAULT DEPENDENCY FLOWCHART (235 KG) 4-Phase Zero-Slack Progression Across 1F Courtyard, 2F Mezzanine & 3F Penthouse (0 kg Idle Mass) PHASE 1: PRE-GIRAFFE (POOL = 55 KG) Initial Pool: 30 kg 5 Chicken + 10 Cat + 15 Penguin Put 15 kg on 2F West Vault Plate UNLOCK: Dog (25 kg) Active Pool = 55 kg (5 + 10 + 15 + 25) 1F Vault B Gold Plate: -15 kg (5 + 10) Powers Focus Stand -> Levitates 1F SE Chest 1F SE Elevator Plate: -15 kg (15 Penguin) Powers 1F -> 2F SE Balcony Elevator 2F SE Stall Release Gate: -25 kg (25 Dog) 55 - 15 - 15 = 25 kg (0 Slack) UNLOCK: Giraffe (60 kg) New Pool = 115 kg Can bridge 2F/3F gaps OR weigh 60 kg PHASE 2: PRE-TIGER (POOL = 115 KG) 1. Bridge 2F Chasm & Latch Lift Cross Giraffe -> Flip 2F SwitchBox ON Reclaim 60 kg Giraffe from 2F bridge Active Pool = 115 kg 2F Crawlspace Gold Plate: -15 kg 15 Penguin (or 10+5) -> Levitates 2F East Chest 2F Back-East Outer Gate: -60 kg Uses: 60 kg Giraffe (Guarded Plate) 1F Back-East Inner Gate: -40 kg Uses: 25 Dog + 15 (115 - 15 = 100 Dual Gate) UNLOCK: Tiger (80 kg) New Pool = 195 kg Heavyweight anchor for 2F->3F Lift PHASE 3: PRE-DEER (POOL = 195 KG) Active Pool: 195 kg 55 Smalls + 60 Giraffe + 80 Tiger Goal: Open Back-West Dual Vault 2F->3F West Elevator Plate: -80 kg Uses: 80 kg Tiger (Powers 3F Lift) 3F Overlook Outer Gate: -60 kg Uses: 60 kg Giraffe (on 3F Overlook) 1F Back-West Inner Gate: -55 kg Uses: 25+15+10+5 (195 - 80 = 115 Dual Gate) UNLOCK: Deer (40 kg) Final Pool = 235 kg Enables Permanent 3F Giraffe Wedge PHASE 4: FINAL 3F EXIT (POOL = 235 KG) Full Pool: 235 kg 55 Smalls + 40 Deer + 60 Giraffe + 80 Tiger 100% Simultaneous Allocation 2F->3F West Elevator: -80 kg (Tiger) Keeps 2F->3F Lift running 3F Chasm Bridge: -60 kg (Giraffe) Wedged permanently (Prevents 3F soft-lock) 3F Penthouse Gold Plate: -40 kg (Deer) Powers 3F Focus Stand -> Levitates 3F Chest 3F Final Exit Gate: -55 kg (Smalls) 235 - 80 - 60 - 40 = 55 kg (25+15+10+5) ROOM 2 COMPLETE 235 / 235 kg Utilized (0 Slack)
STILL LIFE - LEVEL DESIGN COMBINATORICS Room 2 Gate, Elevator & Counterweight Math (4-Phase 100% Utilization) Every phase locks 100% of your currently unlocked animal weight pool across elevators, gold focus plates, bridges, and gates (0 kg slack). 7 Animals · 235 kg 0 kg Slack Per Phase 1. Animal Weight Roster & Unlock Order (Total Pool = 235 kg) PHASE 1 START 5 kg Chicken Calibration Shim · 1F PHASE 1 START 10 kg Cat Plush Paperweight · 1F PHASE 1 START 15 kg Penguin Counterbalance · 2F SW 2F WEST VAULT (15kg) 25 kg Dog Tan Doorstop · Phase 1 PHASE 1 REWARD 60 kg Giraffe * Bridge + 60kg Weight PHASE 2 REWARD 80 kg Tiger Back-East Dual Vault PHASE 3 REWARD 40 kg Deer Back-West Dual Vault 2. Stacked Weight Budget Allocation (55 kg -> 115 kg -> 195 kg -> 235 kg) Gold Focus Plate Lock Elevator Plate Lock Wedged Bridge Lock Target Gate Plate(s) PHASE 1 (Before Giraffe) — Pool: 55 kg (5 + 10 + 15 + 25) 55 - 15 (Gold) - 15 (Elev) = Gate 25 kg -> Unlocks 60 kg Giraffe -15 Gold -15 Elev Gate 25 (Dog) 55 / 235 kg (100% of Phase 1 Pool) PHASE 2 (Before Tiger) — Pool: 115 kg (55 Smalls + 60 Giraffe) 115 - 15 (Gold) = Dual Gate 100 kg (60 + 40) -> Unlocks 80 kg Tiger -15 Gold 2F Outer Gate: 60 kg (Giraffe) 1F Inner Gate: 40 kg (25+15) 115 / 235 kg (100% of Phase 2 Pool) PHASE 3 (Before Deer) — Pool: 195 kg (55 Smalls + 60 Giraffe + 80 Tiger) 195 - 80 (Elev) = Dual Gate 115 kg (60 + 55) -> Unlocks 40 kg Deer 2F->3F Elevator Lock: -80 kg (Tiger) 3F Overlook Outer Gate: 60 kg (Giraffe) 1F Inner Gate: 55 kg (25+15+10+5) 195 / 235 kg PHASE 4 (After Deer · Final Exit) — Pool: 235 kg (55 Smalls + 40 Deer + 60 Giraffe + 80 Tiger) 235 - 80 (Elev) - 60 (Bridge) - 40 (Gold) = Final Gate 55 kg 2F->3F Elevator Lock: -80 kg (Tiger) 3F Bridge Lock: -60 kg (Giraffe Wedged) 3F Gold Plate: -40 kg (Deer) 3F Final Exit Gate: 55 kg (25+15+10+5) 3. Phase-by-Phase Equation Cards & Progression Flow PHASE 1 · PRE-GIRAFFE Pool = 55 kg AVAILABLE ANIMALS: 5 Chicken + 10 Cat + 15 Penguin + 25 Dog (via 15kg 2F West Vault) SIMULTANEOUS LOCKS: • 1F Gold Plate: -15 kg (5+10) • 1F SE Elevator: -15 kg (15) • 2F Giraffe Gate: -25 kg (25) Equation: 55 - 15 - 15 = 25 kg UNLOCKS: 60 kg Giraffe (+60) PHASE 2 · PRE-TIGER Pool = 115 kg AVAILABLE ANIMALS: 55 kg Smalls (5 + 10 + 15 + 25) + 60 kg Giraffe (2F Switch Latched) SIMULTANEOUS LOCKS: • 2F Gold Plate: -15 kg (15) • 2F Outer Gate: -60 kg (60) • 1F Inner Gate: -40 kg (25+15) Equation: 115 - 15 = 100 (60+40) UNLOCKS: 80 kg Tiger (+80) PHASE 3 · PRE-DEER Pool = 195 kg AVAILABLE ANIMALS: 55 kg Smalls + 60 kg Giraffe + 80 kg Tiger SIMULTANEOUS LOCKS: • 2F->3F Elevator: -80 kg (Tiger) • 3F Outer Gate: -60 kg (Giraffe) • 1F Inner Gate: -55 kg (Smalls) Equation: 195 - 80 = 115 (60+55) UNLOCKS: 40 kg Deer (+40) PHASE 4 · 3F EXIT Pool = 235 kg AVAILABLE ANIMALS: 55 Smalls + 60 Giraffe + 80 Tiger + 40 kg Deer SIMULTANEOUS LOCKS: • 2F->3F Elevator: -80 kg (Tiger) • 3F Chasm Bridge: -60 kg (Giraffe) • 3F Gold Plate: -40 kg (Deer) • 3F Final Gate: -55 kg (Smalls) 235 - 80 - 60 - 40 = 55 kg ROOM 2 EXIT OPEN! Why Phase 3 Cannot Be Skipped: Without the 40 kg Deer (Pool = 195 kg), locking 80 kg on the 2F->3F Elevator + 60 kg in the 3F Bridge leaves only 55 kg on 3F (95 kg needed for 40 Gold + 55 Gate). Why 3F Giraffe Locks After Deer: In your initial notes, 'plate lock -100' combined 60 Giraffe + 40 Deer on the 3F Gold Plate. Permanently wedging the 60 kg Giraffe in the 3F gap + setting Gold Plate to 40 kg prevents 3F chasm soft-locks. Bonus — Room 3 (Freezing Foundry) Pool (225 kg): 5 Chicken + 15 Penguin + 25 Dog + 80 Tiger + 100 Horse (via 40kg 1F Pit Gate) -> 80 kg Tiger jams Center Stomper + 140 kg (100+25+15) opens 2F Exit Gate!
Room II Level Design Map: Multi-elevation blueprint (1F Courtyard, 2F Mezzanine, 3F Penthouse) detailing all 7 animal vaults, 3 Focus Stands, 2 elevators, and 4.2m Giraffe chasm bridges.
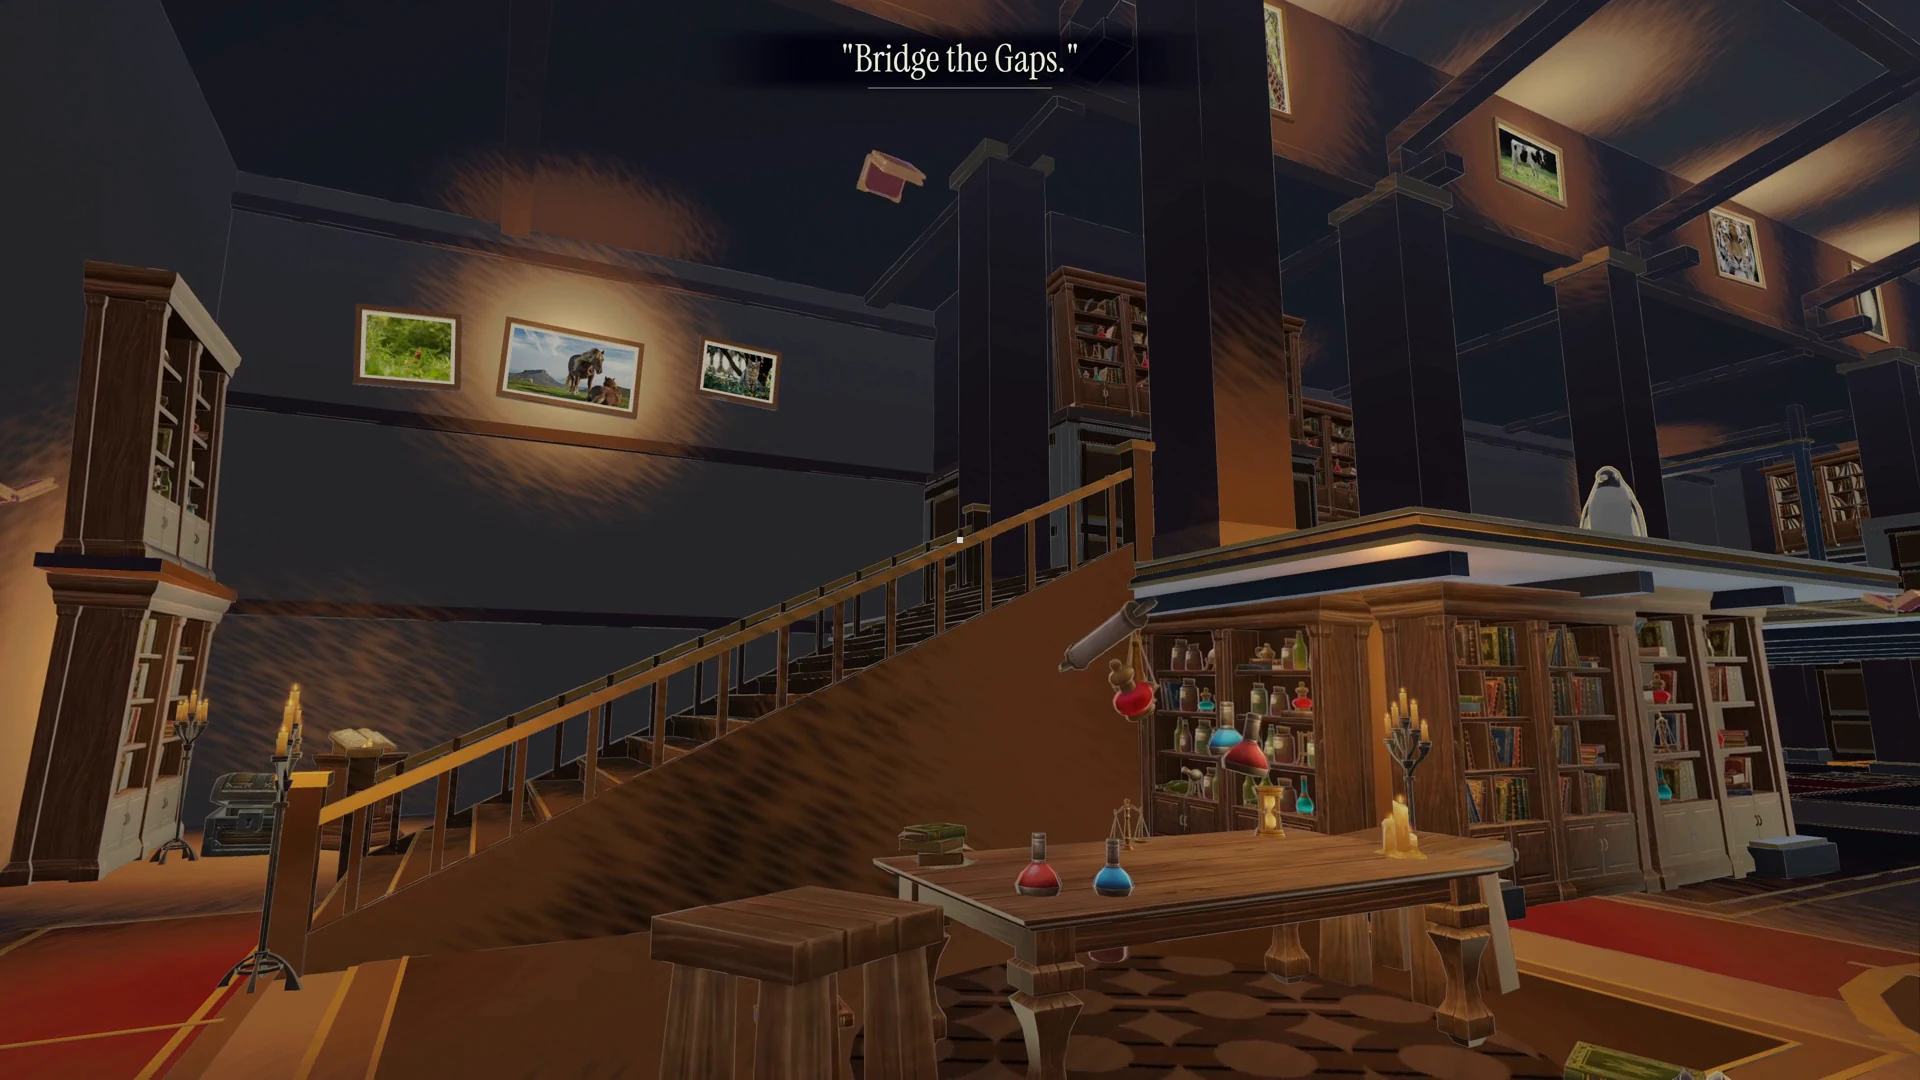
Room II Atrium: Looking across the three-story archive where living book flocks flutter past rigid animal vaults.
Carrying the 60 kg Giraffe specimen past an active golden Focus Stand beam pinning a 1F Chest Mimic.
Dual-purpose geometry: tipping the 60 kg Giraffe across the 4.2m 2F chasm to reach the SwitchBox and latch the elevator.
05

05 / Hallway II & Room III

The Cryo-Foundry and inverted vent circuits

Hallway II introduces Freezing Air Vents that blast icy blue streams across the corridor; while the player can walk through cold jets, the Desk Lamp shivers and freezes at the edge of the stream until a brass plate cuts power to the vent.

Room III (The Cryo-Foundry) subverts standard pressure-plate logic through Inverted 'Turn-Off' Vent Tiles. Pre-placed animal specimens sit on weighted tiles that actively power the room's freezing jets. Harvesting an animal off its tile simultaneously shuts off the cryo-vent (clearing the Desk Lamp's path) and adds that specimen to your inventory so you can wedge the 80 kg Tiger and 100 kg Horse directly into the three mechanical jammer intakes of the Colossal Central Stomper.

ROOM III: INVERTED 'TURN-OFF' VENT TILES & 3-MARKER CENTRAL STOMPER CIRCUIT Unifying Hazard Deactivation & Heavy Counterweight Harvesting Into a Single Systemic Loop 1. INVERTED VENT-POWERING TILES (ControlledByPowerTile) INITIAL STATE: Pre-Placed Animal on Tile (Weight >= Threshold) • Manhattan conduit glows ACTIVE; Freezing Air Vent blasts icy stream • Desk Lamp is blocked by the freezing jet; animal mass is tied up on tile PLAYER ACTION: Pick Up Pre-Placed Animal (Weight < Threshold) • Effect A: Tile deactivates -> Freezing Cryo-Vent SHUTS OFF for the Lamp! • Effect B: Animal enters your inventory Pool to jam the 3 Stomper Nodes! 2. 3-MARKER CENTRAL STOMPER & 3 INDUSTRIAL JAMMERS Jammer Node #1 (Lower West) Wedge Heavy Animal -> Marker [1] OFF Jammer Node #2 (80kg Tiger) Jams Central Gears -> Marker [2] OFF Jammer Node #3 (100kg Horse) Locks Upper Flywheel -> Marker [3] OFF CENTRAL STOMPER ActiveMarkers == 0 All 3 Green Conduits OFF Jaws Lock Open at Y=2.95m Passage to Room IV Open
Hallway II & Room III Level Design Map: Cryo-vent streams, Inverted 'Turn-Off' Vent Tiles, and the 3 green Manhattan conduits feeding the Colossal Central Stomper.
Hallway II: Icy cryo-vent jets block the shivering Desk Lamp until the 25 kg Dog depresses the shutoff plate.
Room III Cryo-Foundry: The Colossal Central Stomper guarded by three active green conduit markers.
Mechanical jamming: wedging the 80 kg Tiger directly into Jammer Node #2 to lock the central gears.
Jamming the upper flywheel with the 100 kg Horse extinguishes the final green marker and locks open the Central Stomper.
06

06 / Room IV & V Finale

Breaking player conditioning at the Shredder

Transitioning into Hallway III and Room IV, the loading screen displays FIG. 04 — DESK LAMP (1.4 KG) with a quiet catalog note: 'It shivers in the dark and leans into your hand like something alive, but to the gallery's sensors it is still just an object.' Inside Room IV's 4-directional infinite steel lattice, an Industrial Dual-Shaft Shredder blocks the exit with the prompt: INSERT 1 OBJECT TO PROCEED. Sitting beside the hopper is the 25 kg Dog.

Conditioned by three rooms of treating animals as expendable hardware, players instinctively grab the Dog and drop it into the chute—only for the shredder to blare 'BZZZT! SAFETY MECHANISM ACTIVATED: LIVING ORGANISM DETECTED!' and eject the Dog unharmed. With zero loose props in the room, the realization lands without a word of dialogue: the mute animals were alive all along, and the shivering 1.4 kg Desk Lamp is the only inanimate object the sensors will accept. Sacrificing the Lamp opens the portal into Room V's pure white void, where the ink outlines dissolve and the Dog awakens—breathing, perking its ears, tilting its head, and wagging its tail.

ROOM IV & V: BREAKING PLAYER CONDITIONING & THE PURE WHITE AWAKENING How 3 Rooms of Mechanical Conditioning Set Up a Single Unscripted Moral Reversal 1. CONDITIONING (ROOMS I–III) • Animals = Kilograms, bridges & wedges • Desk Lamp = Beloved living companion • Room IV Shredder Prompt: "INSERT 1 OBJECT TO PROCEED" Player Reflex: Grab the 25kg Dog & insert 2. REJECTION (LIVING ORGANISM!) BZZZT! SAFETY MECHANISM ACTIVATED: LIVING ORGANISM DETECTED • Shredder refuses to grind Dog & ejects it • Zero Loose Props: Nothing else in room Realization: The animals are alive. 3. THE 1.4 KG LAMP SACRIFICE FIG. 04 — DESK LAMP (1.4 KG) • Echoes Loading Screen 4 catalog note • Player picks up shivering Lamp & inserts • Machine accepts 1 inanimate object Unlocks the Pure White Portal (Z=154m) 4. ROOM V: LIVING DOG FINALE • Ink shader dissolves to pure white • At Z=184m, the Dog awakens: Breathing, ear perks, head tilt, tail wag FinaleLivingDogSequence.cs
Hallway III, Room IV & V Level Design Map: The 4-directional infinite lattice (Z = +118m to +156m), the Industrial Shredder moral reversal, and the Room V Pure White Awakening.
Foreshadowing via archival UI: FIG. 04 — DESK LAMP (1.4 KG) notes that to the gallery's sensors, the Lamp is still just an object.
Room IV: The Industrial Shredder rejects the 25 kg Dog ('LIVING ORGANISM DETECTED!'), exposing the player's conditioning.
The unscripted reversal: holding the shivering 1.4 kg Desk Lamp—the only 'inanimate object' the shredder will accept.
Room V (Pure White Void): Stripped of the gallery's ink-and-plaster shader, the Dog awakens—breathing, tilting its head, and wagging its tail.
07

07 / Technical Art & Retrospective

Surrealist shaders, Manhattan telemetry, and takeaways

1. Contrasting Shaders Enforce Ontological Bias: Rigid animals use ArchivalAnimalSpecimen.shader (triplanar ink cross-hatching, deadpan plaster diffuse, and zero vertex motion) while appliances use LivingApplianceCreature.shader (7 FPS hand-drawn vertex boil, cold shivering displacement, and warm subsurface blush). The visual pipeline reinforces the player's bias before Room IV subverts it.

2. Zero-HUD Manhattan Conduit Telemetry: Every pressure plate, focus stand, elevator, and crusher communicates through orthogonal floor and wall conduits (ConduitDirectionalPulse.shader) color-coded by function—Cyan for gates/lifts, Gold for Focus Stands, and Green for Stomper jammers—eliminating floating UI wires inside complex 3-story spaces.

3. Combinatorial Rigor Prevents Physics Cheese: Locking 100% of the player's unlocked animal mass at each phase of Room II (55 kg → 115 kg → 195 kg → 235 kg) ensured every specimen had to be re-routed and re-evaluated rather than hoarded.

Shader / Technical SystemTarget Visual DomainImplementation & Design Function
ArchivalAnimalSpecimen.shaderRigid Animal Specimens (5–100 kg)Triplanar procedural ink cross-hatching + deadpan plaster/taxidermy diffuse ramp + world-space brass calibration ring at pedestal height (zero vertex displacement).
LivingApplianceCreature.shaderLiving Appliances (Lamp, Mimics, Books)Quantized 7 FPS hand-drawn vertex line-boil + high-frequency shivering displacement in cold/dark + warm subsurface blush driven by global _StillLife_LampPosWS.
ConduitDirectionalPulse.shaderZero-HUD Manhattan Conduit TelemetryOrthogonal floor/wall conduit meshes with directional energy pulses color-coded by circuit type: Dormant Charcoal -> Active Cyan (Gates/Lifts), Gold (Focus Stands), Green (Stomper Jammers).
Room4AvantGardeInfiniteBuilder.cs4-Directional Infinite MegastructureConsolidates hundreds of 4-directional (Left, Right, Up, Down) Hallway III & Room IV replica cells, steel grating floors, and shredder silhouettes into 6 UInt32 static meshes (~6 draw calls at 200+ FPS).
StillLifeSurrealistRendererFeature.csKuwahara & Pure White Finale DissolveFull-screen URP renderer feature combining Kuwahara painterly brush filtering (radius 1.25), 6 FPS boiling paper grain, ink outlines, and PureWhiteFinaleSuppression (1.0 -> 0.0 dissolve in Room V).

Related gallery work

Visuals and production studies.

View gallery →
Still Life Room II Three-Story Menagerie Archive reveal

Still Life

Open gallery set →

← All projects

Next

An Echo Has No Shape →

© 2026 leficious — Technical & Combat Design

leficious.com